Qfactor allows you to create a new proposal or create a new project. Â This gives you the flexibility to utilize the proposal features or skip right to projects. Â Whatever way suits your business needs. Â This example will walk through Create New Project.
Watch the VIDEO DEMO of Create New Project and Add Contacts
(Or follow the screenshots and bullet points instructions below.)
Create New Project
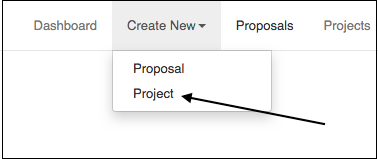
- Select Create New … Project from top menu.
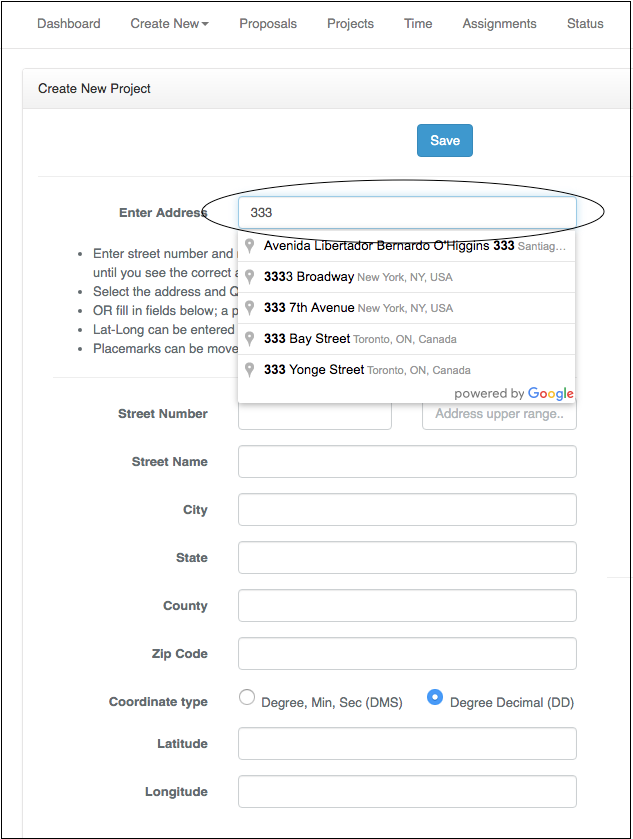
- Begin typing in address box and make use of the Google Maps autocomplete feature. Â Select the valid address from the list.
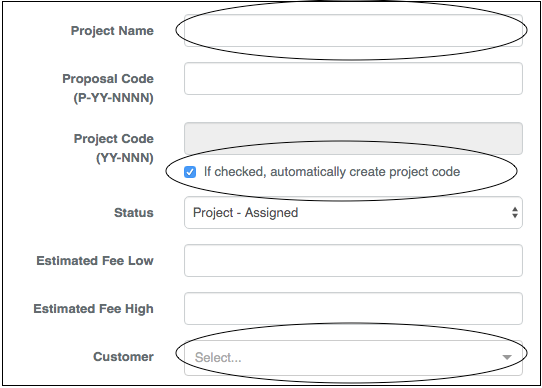
- Project Name can be whatever shorthand name you use for your project.
- A Project Code will automatically be generated, but you can enter it manually by unchecking the box.
- Project Status defaults to “Project – Assigned”.
- Begin typing in Customer box and make use of the connection to your Quickbooks customer list. Â Select the valid customer from the list.
- Estimated fees may be entered if they are known at this stage, if not, wait until after the Services are added with the Task Estimator.
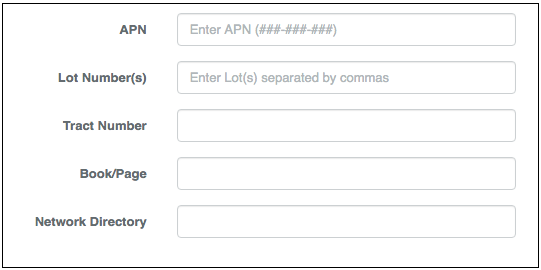
- APN, Lot Number, Tract Number, Book/Page, Network Directory are available to help capture information.
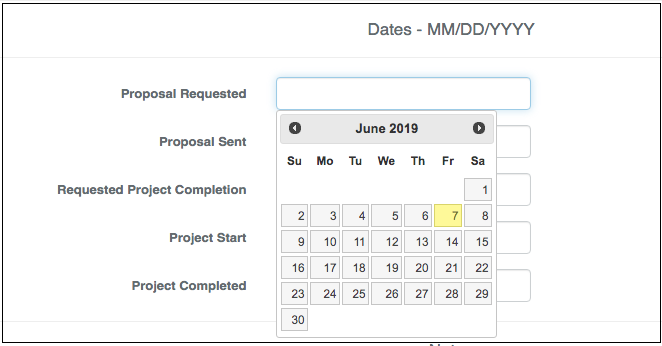
- Dates … For a new project, enter Requested Project Completion date and Project Start date using the calendar.
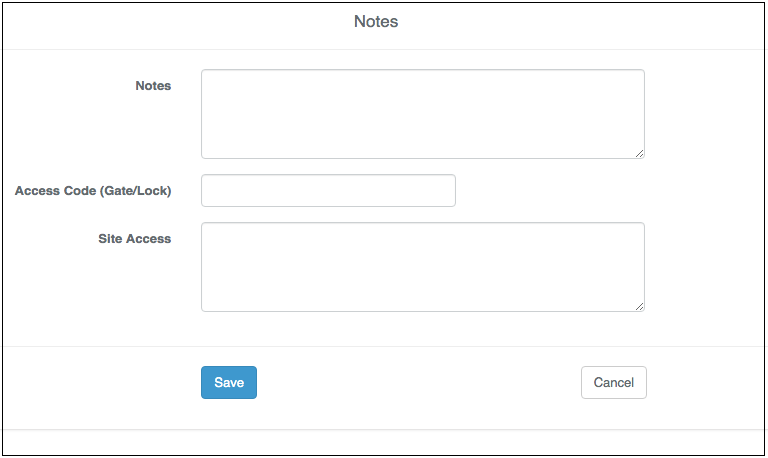
- Notes … Use this space for notes, access codes, and site access.
Don’t forget to SAVE.
Add Contacts
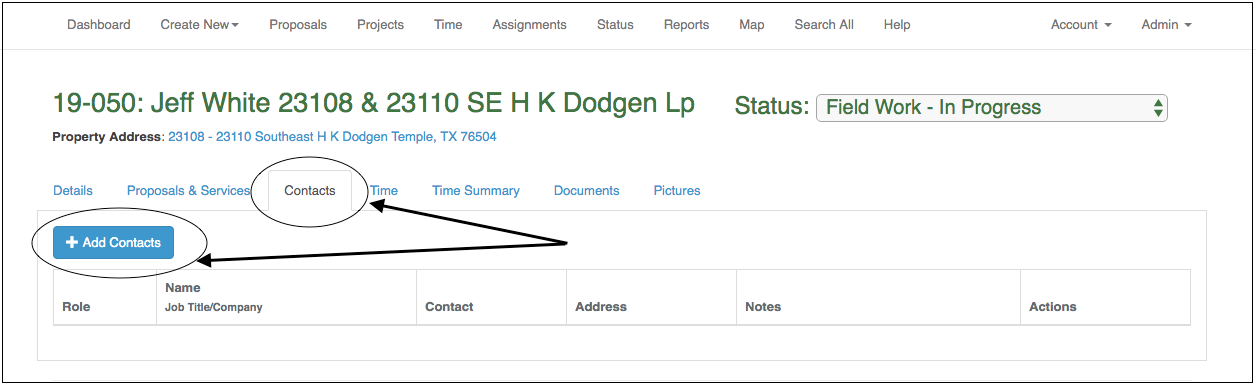
Once saved, the project details view is shown. Â Next, add contacts, or at least add the Primary Contact.
- Select the Contacts tab.
- Select Add Contacts button.
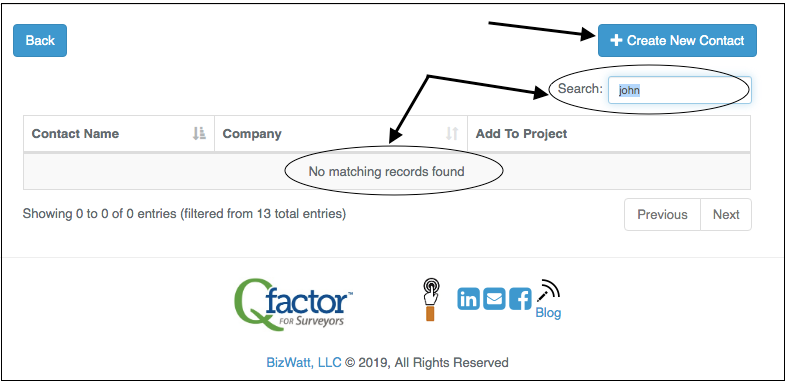
- Use the Search box to type in the name of the Primary Contact. If the contact doesn’t exist in Qfactor, then you can Create New Contact right here. Â Select Create New Contact button.
- Select a project role from the drop-down box (Primary Contact) and fill in information below.
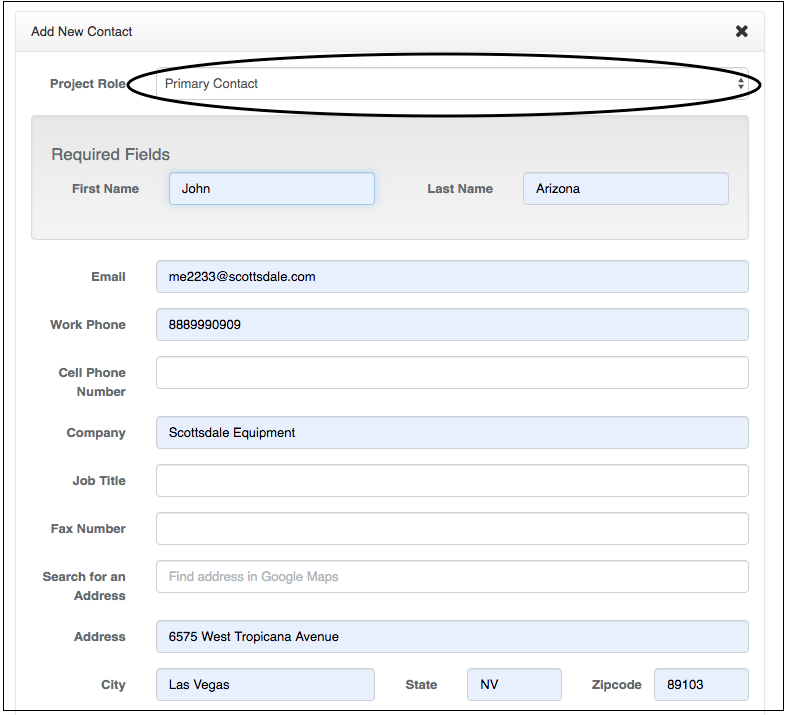
- Don’t forget to SAVE.


